Buck Regulator Hookup Guide a learn.sparkfun.com tutorial
Available online at: http://sfe.io/t1890
Introduction
Who doesn't occasionally need power regulation? We certainly do, so we've designed the SparkFun Buck Regulator Breakout and the SparkFun BabyBuck Regulator Breakout to help us with just such a task.
Starring the AP63203 from Diodes Inc, both breakout boards take advantage of the 2A synchronous buck converter that has a wide input voltage range of 3.8V to 32V and fully integrated 125mΩ high-side power MOSFET/68mΩ lowside power MOSFET to provide high-efficiency step-down DC/DC conversion. All of this snuggled up in a a low-profile, TSOT26 package that's integrated into either a 1x1" or 0.4x0.5" board. For a wide variety of power management needs - grab yourself a Buck Regulator or Baby Buck Regulator and let's dive in!


Required Materials
To follow along with this tutorial, you will need the following materials. You may not need everything though depending on what you have. Add it to your cart, read through the guide, and adjust the cart as necessary.
Tools
You will need a soldering iron, solder, and general soldering accessories.


Suggested Reading
If you aren’t familiar with the following concepts, we recommend checking out these tutorials before continuing.
How to Solder: Through-Hole Soldering
Electric Power
Hardware Overview
AP63203
The AP63203 is a 2A, synchronous buck converter from Diodes Inc that has a wide input voltage range (3.8V to 32V) and provides high-efficiency step-down DC/DC conversion to 3.3V. Frequency Spread Spectrum (FSS) reduces EMI and a proprietary gate driver scheme resists switching node ringing without sacrificing MOSFET turn-on and turn-off times, which further erases high-frequency radiated EMI noise. Full details can be found in the datasheet.
Features:
- VIN 3.8V to 32V
- Up to 2A Continuous Output Current
- 0.8V ± 1% Reference Voltage
- 22µA Ultralow Quiescent Current
- Switching Frequency - 1.1MHz
- Supports Pulse Frequency Modulation (PFM)
- Up to 80% Efficiency at 1mA Light Load
- Up to 88% Efficiency at 5mA Light Load
- Fixed Output Voltage - 3.3V
- Proprietary Gate Driver Design for Best EMI Reduction
- Frequency Spread Spectrum (FSS) to Reduce EMI
- Precision Enable Threshold to Adjust UVLO
- Protection Circuitry
- Overvoltage Protection
- Cycle-by-Cycle Peak Current Limit
- Thermal Shutdown
| Image may be NSFW. Clik here to view. 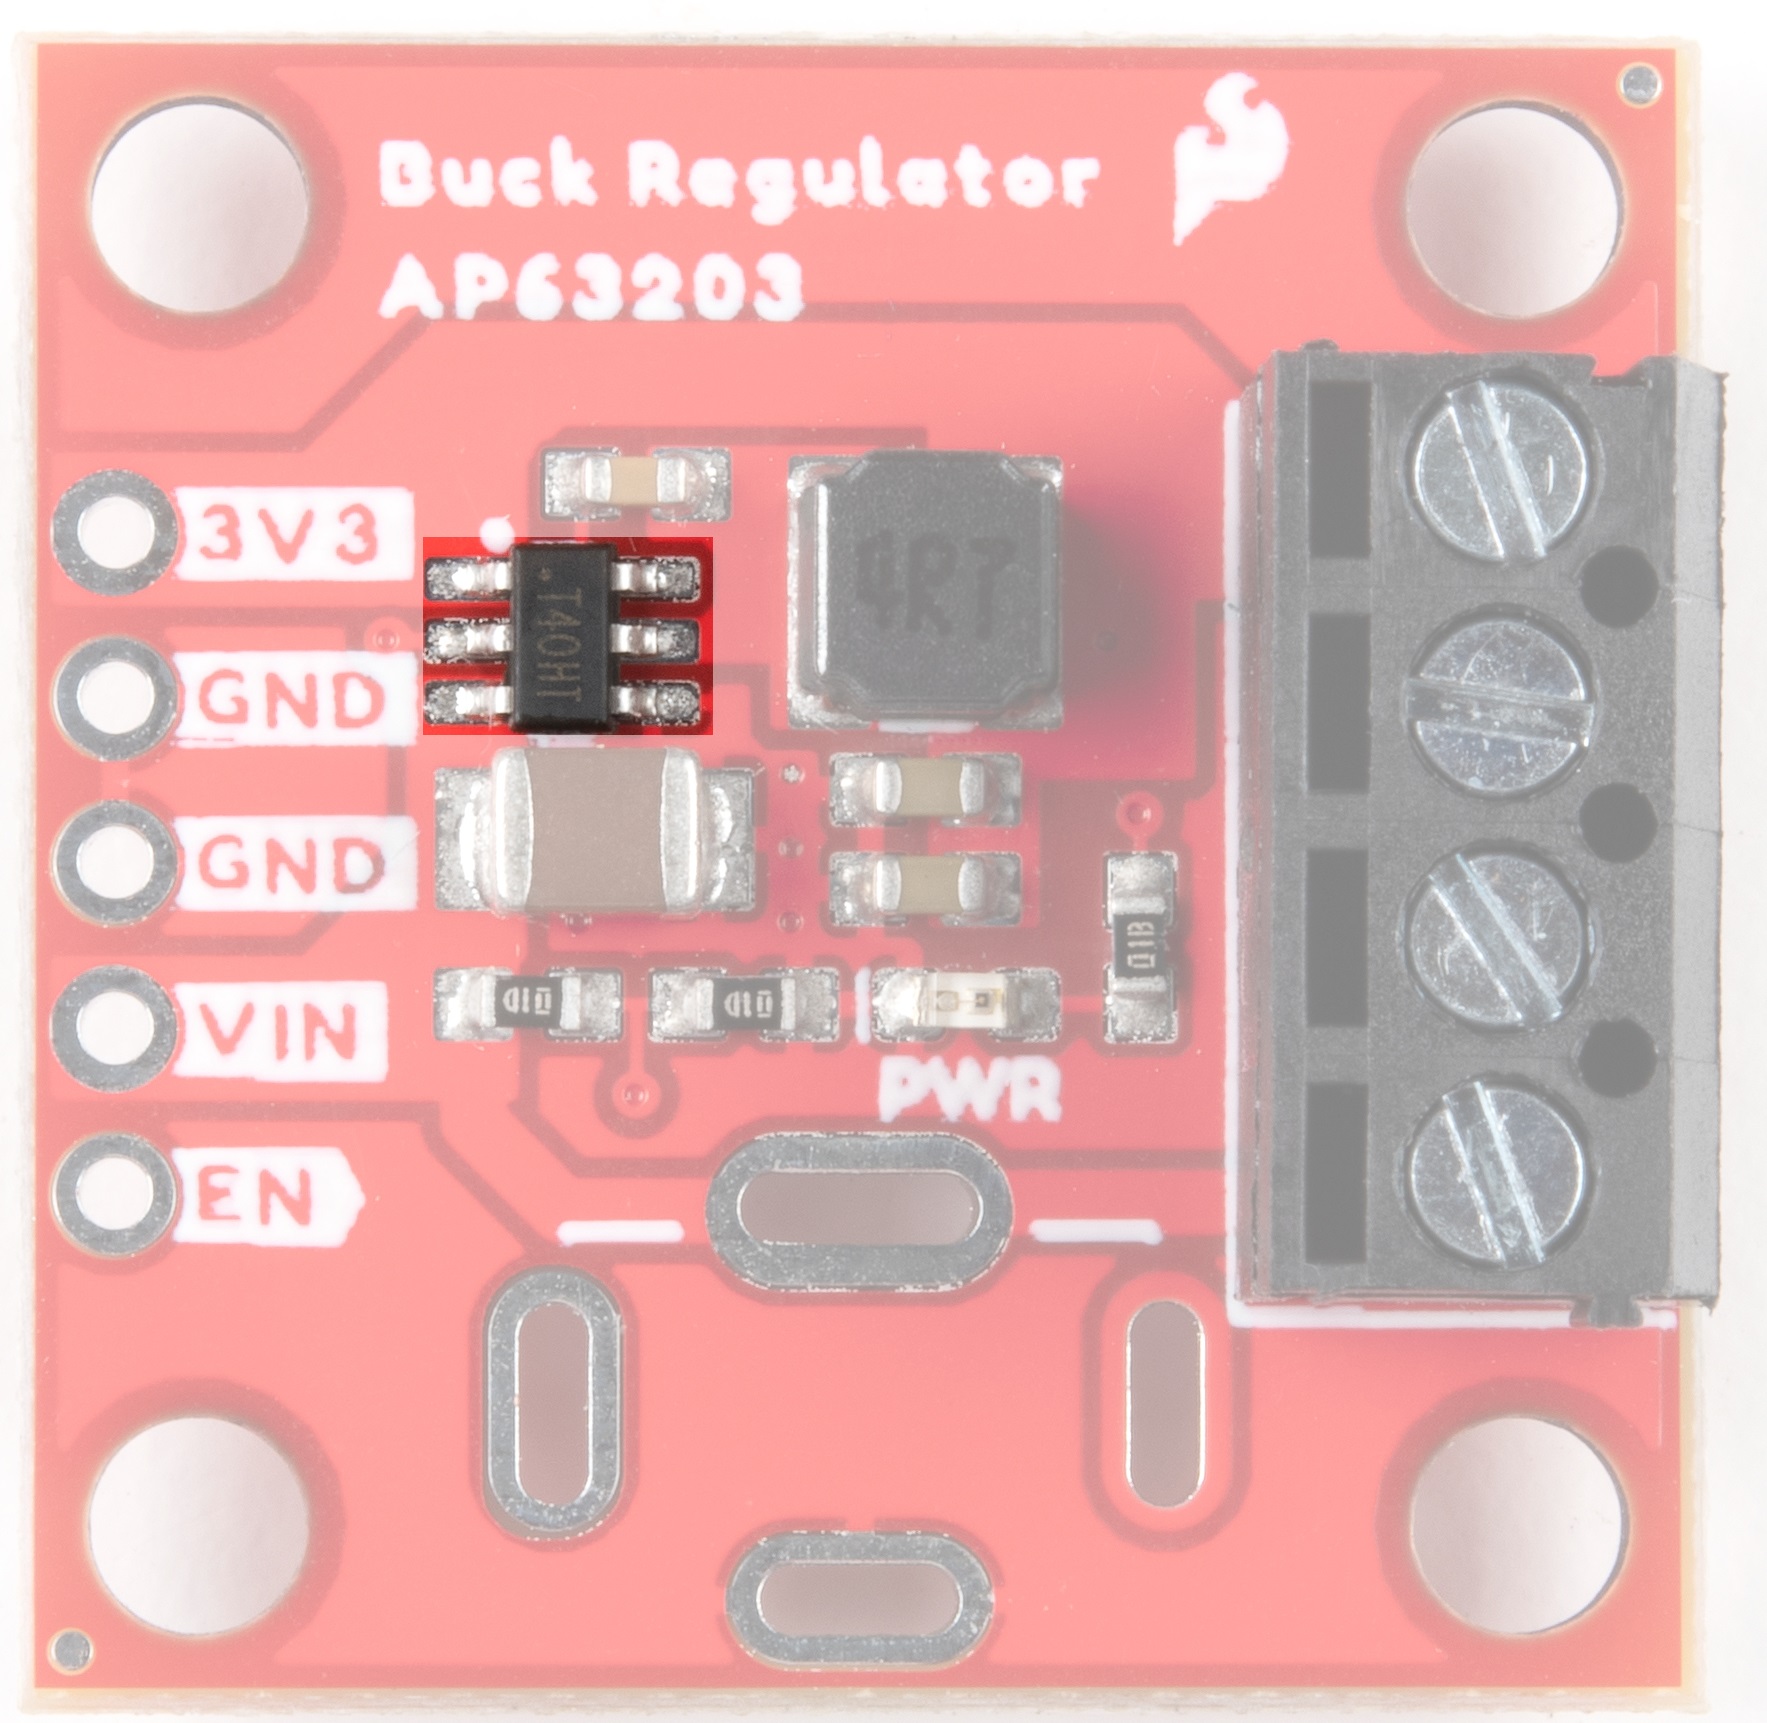 | Image may be NSFW. Clik here to view.  |
| AP63203 on the Buck Regulator | AP63203 on the Baby Buck Regulator |
Power
For the Buck Regulator, input power can be supplied in a number of ways. There are screw terminals on the right side of the board, solder pads for a barrel jack, which can be mounted on the top or bottom side of the board, and the plated through holes on the left side of the board can all be used as input. Output can be obtained via the screw terminals or the plated through holes.

The Baby Buck sacrifices flexibility for space. Use the plated through holes for input and output power.

Both the Buck Regulator as well as the Baby Buck Regulator ratchet the output voltage down to 3.3V. Be mindful that thermal properties change as Vin increases.
Thermal Characteristics
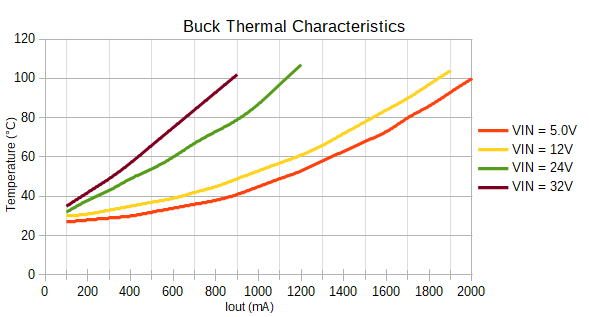
One of the benefits of a buck converter over a linear regulator is their superior efficiency at stepping down the voltage. Unfortunately though, heat can still be a problem, particularly as the difference between the input and output voltage increases.
One of the trade-offs of the small size of the BabyBuck is because there is less copper to pull heat away from switching IC, the maximum output current available is reduced due to the thermal protections. Refer to the graphs below to see the how hot you can expect the AP63203 to get at various loads and supply voltages.

To dissipate some of the excess heat, we've added a copper pad for a heat sink on the back of the 1" x 1" Buck Regulator Board. Use one of our small heatsinks and attach it with some thermal tape.

Power LED and Jumper
On the 1" x 1" Buck Regulator, there is a power LED available for use.

To disable this LED, cut the Jumper on the back of the board:

Board Outline
Buck Board Outline:

Baby Buck Board Outline:

Hardware Hookup
There are three options when using the 1" x 1" Buck Regulator.
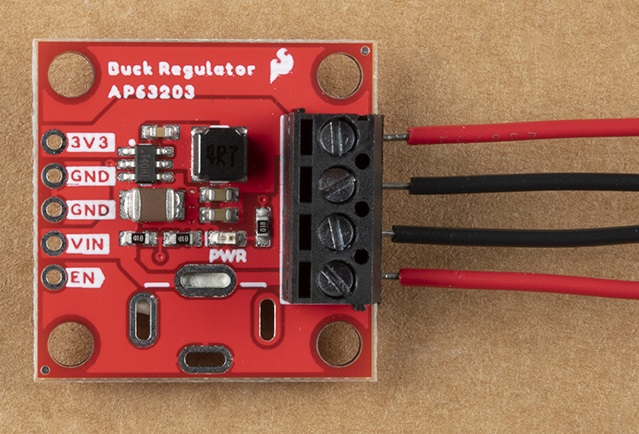
Screw terminals
To use the screw terminals, simply insert the correct wires into the screw terminal opening and gently tighten the screw for that port. Your board should look similar to the following:
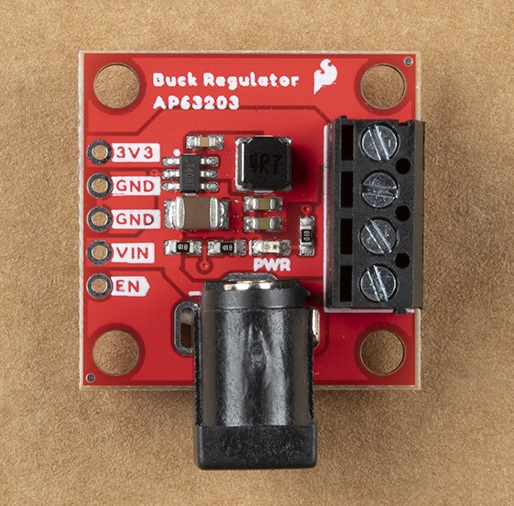
Barrel Jack
To use a barrel jack for input, grab one of our PTH Mount Barrel Jack Connectors and solder that sucker on. It should look something like what you see here:
PTH Pins
To use the plated through holes on either the Buck Regulator or the Baby Buck Regulator, you'll need to solder either straight headers or angle headers to the board.

Troubleshooting
If your product is not working as you expected or you need technical assistance or information, head on over to the SparkFun Technical Assistance page for some initial troubleshooting.
If you don't find what you need there, the SparkFun Forums are a great place to find and ask for help. If this is your first visit, you'll need to create a Forum Account to search product forums and post questions.
Resources and Going Further
For more information, check out the resources below:
Buck Regulator:
Baby Buck Regulator:
Need some inspiration for your next project? Check out some of these related tutorials:
Battery Technologies
Photon Battery Shield Hookup Guide
Hookup Guide for the SparkFun RedBoard Artemis Nano
Fuse Breakout Board Hookup Guide
learn.sparkfun.com | CC BY-SA 3.0 | SparkFun Electronics | Niwot, Colorado