Piezo Vibration Sensor Hookup Guide a learn.sparkfun.com tutorial
Available online at: http://sfe.io/t515
Introduction
Piezo sensors are flexible devices that generate electric charge when they’re stressed. This characteristic makes piezos an ideal solution for low-power flex, touch, and vibration sensing. In more advanced applications, piezos can be the foundation for energy harvesting. Piezo’s are the perfect sensor for catching when your fridge is running or as the power source for energy harvesting shake-lights.

Piezo’s have the potential to produce very large AC voltage spikes – ranging upwards of ±50V. Because they produce such high voltages, large resistors are often used to “load down” the piezo sensor in vibration-sensing applications. Zener diodes can also be used to clamp voltages down to safe levels.
Suggested Materials
This tutorial serves as a quick primer on piezo vibration sensors, and demonstrates how to hook them up and use them. Beyond the sensor, the following materials are recommended:
Arduino Uno– We’ll be using the Arduino’s analog-to-digital converter to read in the voltage produced by the piezo sensor. Any Arduino-compatible development platform – be it a RedBoard, Pro or Pro Mini– can substitute.
Resistor Kit– To dampen the piezo sensor’s AC voltage spikes, a large load resistor – somewhere around 1MΩ – is used. This resistor kit includes multiple 1MΩ’s, in case you want to combine a few in series.
Breadboard and Jumper Wires– The piezo sensor’s legs are spaced by 0.2" and are breadboard compatible. We’ll stick them and the resistor into a breadboard, then use the jumper wires to connect from breadboard to Arduino.


Suggested Reading
Piezos are an great entry-level component for beginners, but there are still a few basic electronics concepts you should be familiar with. If any of these tutorial titles sound foreign to you, consider skimming through that content first.
Analog to Digital Conversion
Analog vs. Digital
Vibration Sensor Overview
Piezo vibration sensors come in a variety of shapes and sizes. Here is a selection from the SparkFun catalog:

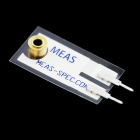
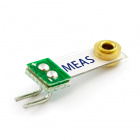
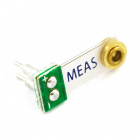
Some piezo sensor’s include weights at the end to help encourage vibration.
AC Voltage Source
Piezo sensors are unique because they produce an alternating current (AC) voltage when stressed, converting mechanical energy to electrical. If you hooked an oscilloscope up to a piezo sensor, you might see waveforms like this when the sensor shakes:

The signals above were generated by simply inserting a large, weighted piezo into a breadboard and flicking it a few times. Note the voltage spikes are reaching almost +20V and -12V. Signals at that level have the potential to permanently damage a microcontroller’s analog-to-digital converter (ADC) pins.
To dampen those voltage spikes, we have a few simple tricks up our sleeve. The easiest fix is to load the piezo with a large resistor. By placing a 1MΩ resistor in parallel with the sensor, for example, we can drop the voltage spikes down to safer levels.

In the graph above, the sensor is loaded with a 1MΩ resistor and connected to an Arduino ADC. The voltages spike between -0.5 and +5V are safely within the tolerable range of the ATmega328’s I/O pins.
More complex piezo damping circuits might include zener diodes to clamp the voltage or op amps to buffer a signal, but this simple resistor-loading circuit is a good place to start.
Example Circuit
Using the 1MΩ load resistor dampening method described above, here’s a simple example circuit demonstrating how to hook up the vibration sensor:

The Piezo is grounded on one end, and a generated voltage is routed to the Arduino’s A0 ADC pin. Reading the voltage at that pin should give us an idea of how much the piezo is moving.
Example Code
Here is a really simple Arduino example based on the circuit above. Copy and paste this into your Arduino IDE (or use Codebender), then upload!
NOTE: For this example, we're hosting the code on codebender, which not only features code-sharing, but also allows anyone to upload and debug Arduino sketches from within a web browser. Plus, it works on lower-tech machines, like Chromebooks!
There are codebender plugins for Chrome, Chromium, and Firefox. Visit the codebender plugin page for help installing the codebender plugin.
Once the circuit is set up and code is uploaded, open your serial monitor, and set the baud rate to 9600 bps. Or, you can use the embedded serial monitor below.
You should be seeing 0.00’s stream by endlessly. Try shaking the sensor to see the voltages go up.
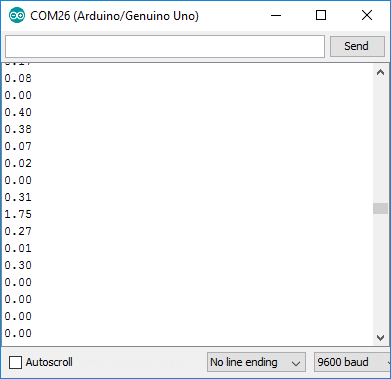
Your eye’s probably aren’t fast enough to catch all of those numbers change. You can either introduce a delay to the end of the loop (e.g. delay(250);), or you can view the output in the serial plotter, found in newer versions of the Arduino IDE. Open the plotter by going to Tools>Serial Plotter.
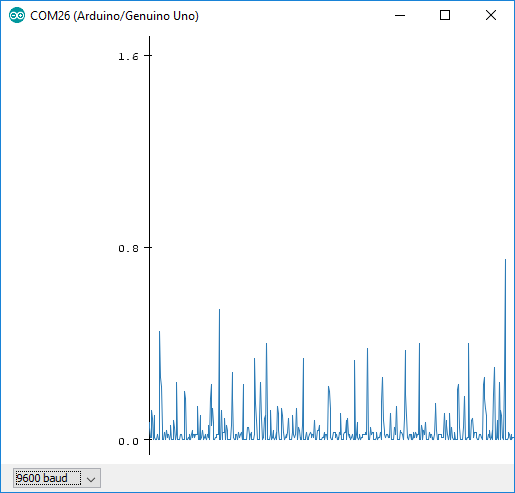
Now, you can create oscilloscope measurements of your own! The graph helps demonstrate the piezo sensor’s voltage spikes and ringing. Try flicking, shaking, or stomping the ground to see how those movements affect the measurements of the piezo sensor.
Once you’ve gotten a handle on that, you can find a “vibration threshold” that will fit your project needs and have your Arduino look for any measurements above that value to detect vibrations.
Resources and Going Further
For more information on piezoelectricity and piezo sensors, check out some of these resources:
Now that you’ve got your Arduino sensing those good vibrations, what kind of shake-sensing project are you going to start? Need some inspiration? Check out some of these related tutorials:
Wake-on-Shake Hookup Guide
MMA8452Q Accelerometer Breakout Hookup Guide
LSM9DS1 Breakout Hookup Guide
Blynk Board Washer/Dryer Alarm
learn.sparkfun.com |CC BY-SA 3.0 | SparkFun Electronics | Niwot, Colorado