Using the A111 Pulsed Radar Sensor with a Raspberry Pi a learn.sparkfun.com tutorial
Available online at: http://sfe.io/t801
Introduction
Does your project require high-precision, cutting-edge distance, speed, motion, and/or gesture sensing? We’re not talking ultrasonic, or even infrared here, but 60GHz radar! Say hello to our tiny, pulsed radar friend!

The A111 is a single-chip solution for pulsed coherent radar (PCR) – it comes complete with antennae and an SPI interface capable of speeds of up to 50MHz. Applications for PCR include distance-sensing, and gesture, motion, and speed detection. The sensor can monitor one-or-more objects at distances of up to two meters.
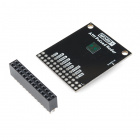
Our breakout board for the A111 includes a 1.8V regulator, voltage-level translation, and it breaks out all pins of the pulsed radar sensor to both 0.1-inch and Raspberry Pi-friendly headers.
Required Materials
To use the A111 you’ll need either an ARMv7 or an ARM Cortex-M4 – the closed-source SDK currently only supports these architectures. This tutorial will explain how to use the radar sensor with a Raspberry Pi– a platform based on an architecture supported by the A111’s SDK.
The A111 Breakout includes a 20-pin, 2x10 female header, which should mate to Raspberry Pi’s of any generation. If you’d rather manually wire the A111 to your Raspberry Pi, male headers and about 9 male-to-female wires should do the trick.

Setup the Hardware
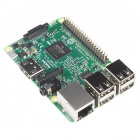
The A111 Pulsed Radar Breakout is designed to sit directly on top of a Raspberry Pi. It doesn’t span all 40 (2x20) pins of a Raspberry Pi B+ (or later), but the 26-pin – 2x13 – header should be compatible with any Pi.
Solder the 2x13 header so the female side is facing away from the greenish-black A111 IC. Then connect the shield to a Raspberry Pi ensuring that the “Pi Display” text on the breakout matches up with the display header on your Pi. The sensor should be facing up after plugging it in.

A111 Breakout plugged into a Raspberry Pi.
Or, if you’d like to manually wire the breakout up to a Pi, here is the pin-out we’ll use through the rest of this tutorial:
| Breakout Pin | Raspberry Pi Pin Name | RasPi Pin Number |
|---|---|---|
| CS | SPI0 CS0 | 24 |
| SCLK | SPI0 SCLK | 23 |
| MISO | SPI0 MISO | 21 |
| MOSI | SPI0 MOSI | 19 |
| INT | GPIO25 | 22 |
| EN | GPIO27 | 13 |
| VCCIO | 3.3V | 1,17 |
| GND | GND | 6, 14, 20, etc. |
| VIN | 5V | 2, 4 |
This board breaks out both "VIN" and "VCCIO" pins. "VIN" should power the sensor, which can consume up to about 80mA. "VCCIO" sets the I/O voltage, which may be lower than VIN.
The Raspberry Pi pin breakouts, for example, connect VIN to 5V and VCCIO to 3.3V, as the Raspberry Pi's 3.3V bus may not be able to fully power the A111, but the Pi can only handle 3.3V I/O.
Get the SDK
The software development kit (SDK) for the A111 is, unfortunately, locked behind a closed source blob that currently only supports Cortex-M4 and ARMv7 platforms.
To download the SDK, visit Acconeer’s “Products” page. Towards the bottom, under the “A1 Software Development Kit” header is a link to GET SOFTWARE**. Read through the license, and agree, then request the A1 SDK for Linux ARMv7 software.

Requesting the ARMv7 SDK from Acconeer.
After supplying your email address, you should receive a download link email nearly instantaneously.
SCP the SDK to your Pi
Once downloaded, you’ll probably need to transfer the ZIP'ed SDK over to your Pi. To achieve this, we recommend SCP. If you’re on Windows, WinSCP works very well for transferring files from one device to another.

Using WinSCP to drag-and-drop the SDK into the home directory of your Pi.
If you’re on a Mac or Linux machine, with SCP available, you can use a command like the below to copy the ZIP file over:
scp acconeer_evk_service_linux_armv7l_xc111_r4a_xr111-3_r1c_a111_r2c_v1_3_5.zip 192.168.0.100:~
(Make sure you replace “192.168.0.100” with your Pi’s address or localhost name.)
Unzip the SDK
Once uploaded, you can use the terminal to unzip the SDK using the following commands (included are commands to install unzip):
unzip acconeer_evk_service_linux_armv7l_xc111_r4a_xr111-3_r1c_a111_r2c_v1_3_5.zip -d a111
(Make sure you replace the acconeer ZIP file name with that of your downloaded SDK version.)
Then cd to the “a111/evk_service/…” directory to prepare to build the example software.
SDK Overview
The A111 SDK includes source code, archived libraries, include files, and documentation for using the A111 pulsed radar sensor. Here’s a quick overview of what’s included with the SDK:
- doc– Doxygen-generated documentation for the A111 API and source code.
- include– Header and API files which describe how to interact with the pre-compiled A111 libraries.
- lib– Pre-compiled A111 static archives. API for these files are provided in the “include” directory.
- out– Compiled board and example object and executable files.
- rule– Recursive Makefile rules for board and example files.
- source– C source files for custom boards and example applications.
- makefile– Top-level makefile. Recursively calls files in the “rule” directory to build example and board files.
Adding Custom Example and Board Files
The SparkFun A111 Breakout’s default pins will not work with those of the SDK’s examples. To build and run an example with this board, we have an example board definition, make scripts, and example applications. Click the button below to download these files:
Download the SparkX A111 Example Code
If you copy this ZIP file to your home directory, this command will unzip it to the right directory (assuming your SDK was unzipped to: “~/a111/evk_service_linux_armv7l_xc111_r4a_xr111-3_r1c_a111_r2c”
unzip sparkx-a111-source.zip -d a111/evk_service_linux_armv7l_xc111_r4a_xr111-3_r1c_a111_r2c
The SparkX ZIP includes these files, which should be extracted to their matching SDK directories:
- rule/makefile_build_sparkx_detector_distance.inc– Build rules/Makefile for the sparkx_detector_distance.c source file.
- rule/makefile_build_example_*_sparkx– Build rules/Makefile for the sparkx-brekaout example files.
- source/acc_board_rpi_sparkx.c– Board definitions – pin connections, clock frequency, etc, for the SparkX A111 Breakout.
- source/sparkx_detector_distance.c– Modified distance detector source file.
Once downloaded, these files should be extracted to the like spot in the original ZIP file.

Example of SparkX example files added to the “rule” directory. (Don’t forget the “source” directory files too!)
Build and Run the Test Sketch
Building the Board and Example Applications
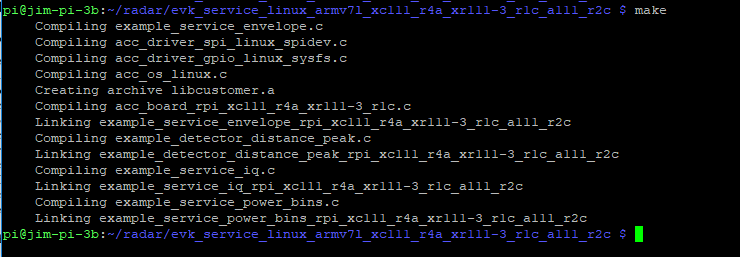
Once uploaded to your Pi, executing the make file – and it’s recursive dependencies – should build all of the examples you may use with the A111. To build all board and example files, navigate to the SDK’s top-level directory and type make.
Troubleshooting
If you have any trouble building the board and example files, ensure that you have gcc and make packages installed. (E.g. apt-get install make gcc)
Running the Example Applications
Once compiled you can run the example application (from the top-level SDK folder) by typing:
./out/sparkx_detector_distance
This will run our modified distance-detector example application. This application will begin by calculating raw peak-distances, with a maximum of ten reflections. Following about 125 samples, the example will briefly estimate minimum and maximum thresholds, then continuously monitor for nearby objects until CTRL+C is pressed.
Evaluating the Example Application
The output of the example application can be a little difficult to parse. Here’s an example output, and an explanation of what each of those values printed out means:
Distance detector: Reflections: 5. Seq. nr: 424. (200-700 mm): 648 mm (137), 658 mm (250), 665 mm (255), 676 mm (209), 686 mm (65)
- Reflections: <r>– r is the number of reflections – a value between 0 and 10 – visible to the A111 sensor.
- Seq. nr <n>– This number – n– should increment with each successive measurement.
- (200-700m)– This is the set measurement range of the A111 sensor.
- <d0> mm (<a0>), <d1> mm (<a1>), …– dn in this example is the distance of reflection n and an is the amplitude of that reflection.
Running Other Examples
In addition to the distance detector, the SDK includes a few extra examples. To execute these files, run them from the out directory:
- sparkx_envelope_service_example– Reads in the envelope data, which us usually further-processed and used in distance, measurement, or other types of algorithms.
- sparkx_envelope_iq_example– Advanced version of the envelope service, which includes phase information for very small variations in distance.
- sparkx_power_bins_example– Demonstrates how to use A111 “power bins,” which are still, kind of, a mystery to us…
Going Further
For help building bigger, better applications around the A111, refer to Acconeer’s SDK documentation, including:
If you need any reference material surrounding our A111 Breakout Board, check out this documentation:
learn.sparkfun.com | CC BY-SA 3.0 | SparkFun Electronics | Niwot, Colorado