EL Wire Hoodie a learn.sparkfun.com tutorial
Available online at: http://sfe.io/t770
Introduction
In this tutorial, we will sew standard EL wire onto a hoodie.

Required Materials
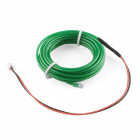
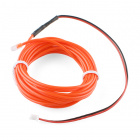
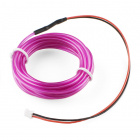
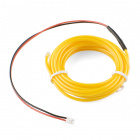
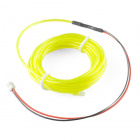
To follow along with this tutorial, you will need the following materials. We will be using a standard EL wire on the hoodie. You may not need everything, depending on what you have and your setup. Add it to your cart, read through the guide, and adjust the cart as necessary.
Looking for EL chasing or bendable EL wire? Click on the button below for additional options in the catalog!


EL Chasing, Bendable, & Types of EL Products
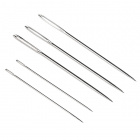
Tools
At a minimum, you will need a needle. If you are making an extension cable, you will need a soldering iron, solder, and general soldering accessories.
You Will Also Need
- Hoodie
- Clear Thread or Fishing Line
- Binder Clips, Pins, or, Tape
- Scissors
Suggested Reading
If you aren’t familiar with the following concepts, we recommend checking out these tutorials before continuing.
Getting Started with Electroluminescent (EL) Wire
Planning a Wearable Electronics Project
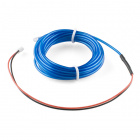
How to Make a Custom EL Wire Extension Cable
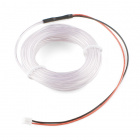
Prepare the EL Wire
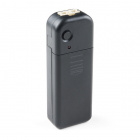
Testing the EL Wire and EL Inverter
Before sewing the EL wire to a piece of clothing, make sure to test it out to see if it is functioning. To test, connect the EL wire to an inverter. In this case, we are using AA batteries and the 3V EL inverter battery pack.

With the battery in the EL inverter battery pack, press the button to test. If the EL wire lights up, both the EL wire and EL inverter are good to go!

Planning the Path
Plan out where to add EL wire. While you can sew the EL wire on the arms, it will be harder due to the amount of room available to work with in the arm. The easiest would be to follow the edge of the hoodie. To hold down the EL wire when sewing, we will be using binder clips. Depending on what you have, you could also try to use pins or tape. Place the EL wire into the binder clip and clamp it down against on the fabric. Make sure to avoid clamping the EL wire down where the binder clip pinches as this can damage the corona wires.

In this case, all 3 meters were used for EL wire starting under the pocket, running up the side of the zipper, around the shoulders, up to the brim of the hood, around the shoulders, down the zipper, and ending at the pocket on the other side. Make sure to avoid sharp bends. If you decide to use a shorter length, you can cut the EL wire. Just make sure to re-seal the cut end with hot glue, otherwise you could end up getting a good jolt..
 |  |
Having a hard time seeing the binder clips and EL wire? Click on the images for a closer look
Prepare the Needle and Thread
For this tutorial, we will double up the clear thread. Prepare your needle and thread by inserting the end of the clear thread through the eye (opening) of the needle and pull it through. Cut about an arms length of thread (approximately 2 feet long) to work with. Tie the two ends of the fishing wires into a knot. You may need to use the needle to help guide the knot close to the end of the thread.

Repeat the steps again for a second knot. Cut of any excess tail left over.

Sewing EL Wire
Start sewing at the EL wire’s heat shrink and tie a knot around the EL wire. Continue making a loop around the EL wire to hold it down. When sewing with clear thread, make sure to pull the thread all the way through since the thread is slippery when sewn in certain fabrics. Be careful not to sew the front and back of the hoodie together. Also, ensure that the distance between each stitch is not too long. About 0.5" to 1.0" is a good stitch. Longer stitches can cause the EL wire to snag or become loose when wearing the EL hoodie.

After about 5x stitches, loop back through the last stitch with a overhand knot to lock the thread in and prevent it from sliding.

Continue sewing and remove any binder clips holding the EL wire down against the fabric. When sewing EL along the zipper, avoid looping the thread against the zipper.

While sewing the EL wire, try holding the EL down against the fabric using your non-dominant hand. Pinch below the area that you are sewing using your thumb and ring finger. Then pinch above the area that you are sewing using your index and middle finger. This keeps the center area (where you will be working with the needle) taut so that it is easier to sew.

Once you begin to run out of thread to work with, tie the clear thread down against the fabric. Then repeat the steps outlined above with another piece of clear thread.
When you are finished sewing the EL wire down, make a loop with the end of the EL wire cable and sew the wire down for strain relief. Make sure this loop is in the wiring beyond the heat shrink, as the connection at the heat shrink is sensitive to bending.

Plug the EL wire back into the EL inverter to test it out. If it lights up, you are good to go! Place the EL inverter in a pocket or clip to a belt to enjoy!

Remember, EL wire works best in low light. It may be hard to see in daylight or in rooms with sources of light.
 |  |
| Front EL Wire Hoodie Low Light | Back EL Wire Hoodie Low Light |
Different Hoodie Sizes
Remember what I said about the size of the hoodie? Different hoodie sizes will require different lengths of EL wire - this variation can cause the EL wire to not start or end where you expect it to. Note the difference in the image in the bottom right.
|  |
| Youth Medium with EL Wire | Youth Large with EL Wire |
Sewing Into The Arms
Looking for a challenge? Sewing EL wire onto the arms can be difficult depending on the fabric being used and the amount of space you have to work with. Three pieces of corrugated cardboard were custom cut to fit inside a hoodie’s arm to help with sewing. To assemble, cut half way into the cardboard about 0.5"-1"“ away from the edge. It does not have to be perfect. Slide the cardboard pieces together and hot glue the joints.

Front View of Cardboard Bracket
Trim down the edges as necessary to slide into the arm with ease.
 |  |
| Top-Side View | Front-Side View |
Once cut and assembled, insert the bracket into an arm.

Clamp the fabric material down against the cardboard bracket and ensure that the fabric material is taut. Continue sewing clear thread down/up the arm.

The following shows standard EL wire sewn into the arms of an adult medium hoodie.
 |  |
| Front View with EL Wire Sewn into Arms | Front-Side View with EL Wire Sewn into Arms |
Resources and Going Further
Need some inspiration for your next project? Check out some of these related tutorials:
EL Wire Light-Up Dog Harness
Heartbeat Straight Jacket
Sound Reactive EL Wire Costume
Prototype Wearable LED Dance Harness
Looking for more ideas, check out these related blog posts:
learn.sparkfun.com | CC BY-SA 3.0 | SparkFun Electronics | Niwot, Colorado