SparkFun Qwiic RFID-IDXXLA Hookup Guide a learn.sparkfun.com tutorial
Available online at: http://sfe.io/t857
Introduction
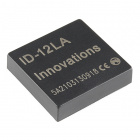
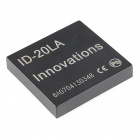
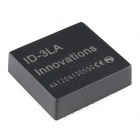
The Qwiic RFID ID-XXLA is an I2C solution that pairs with the ID-LA modules: ID-3LA, the ID-12LA, or the ID-20LA, and utilizes 125kHz RFID chips. Using the product's interrupt pin, we'll discuss how to get, store, and compare unique RFID IDs. Let's take a look at the hardware used for this RFID tutorial.

Required Materials
To follow along with this tutorial, you will need the following materials. You may not need everything though depending on what you have. Add it to your cart, read through the guide, and adjust the cart as necessary.


Tools
You will need a soldering iron, solder, and general soldering accessories.


Suggested Reading
If you aren't familiar with the Qwiic system, we recommend reading here for an overview.
| Qwiic Connect System |
We would also recommend taking a look at the following tutorials if you aren't familiar with them.
Hardware Overview
Qwiic Connectors
This is a Qwiic product but not a "pure" Qwiic product. You'll still need to solder or connect the interrupt pin if you decide to use that to indicate when an RFID card has been read (more on that later). Outside of that, Qwiic is an eco-system designed for I2C devices that allows you to prototype quickly without needing to solder anything. Just plug your Qwiic product into a Qwiic capable microcontroller and you're good to go! There are two on this product which means you can daisy chain the product with other I2C devices, like a Qwiic Keypad for example.

Power
The SparkFun Qwiic RFID ID-xxLA is a 3.3V system. You can power the product with a Qwiic cable plugged into a capable microcontroller. You can also provide power through the 3V3 pin on the header.
LEDs and Buzzer
When you provide power to the board you will see the onboard red power LED light up. There's another LED opposite the power LED labeled READ. This blue stat LED and the onboard buzzer will light or beep respectively when an RFID tag is brought into range.
 |  |
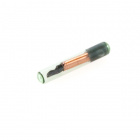
RFID Modules
There are three ID-xxLA options in our catalog that are listed above in the Introduction: the ID-3LA, the ID-12LA, and ID-20LA. If you purchased the SparkFun RFID kit then it includes the ID-12LA and RFID cards that you need. Pictured below is the ID-12LA plugged into the Qwiic RFID.

Each option is similar but there is a small variance in power consumption which translates into different read range capabilities. The ID-3LA is designed to be used with an external antenna which will get you 30cm of range. The ID-12LA and ID-20LA have a range of 12cm and 18cm respectively.
When plugging in your module, just take care that the side with less pins goes into the header with less pins.

Jumpers
There are four jumpers on the header side of the product. Facing the product with the buzzer at the top, you'll see a jumper on the left side labeled INT. The interrupt pin can be disconnected here by cutting the trace. Now moving to the bottom near the header is a jumper labeled I2C that connects the I2C pull-up resistors to the I2C data lines. On the right side is a jumper labeled Buzzer that disconnects the buzzer when cut. This will disable the beeping sound when a RFID card is in range. Finally, the ADDR jumper allows you to change the default I2C jumper from 0x7D to 0x7C.

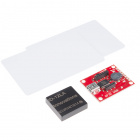
Hardware Assembly
Simply insert a Qwiic cable between the RedBoard Qwiic and the Qwiic RFID reader. You will also need to solder wire between the Qwiic RedBoard's pin 8 and the Qwiic RFID reader's INT pin. When you are ready, align the headers of the module with the Qwiic RFID reader.

Example Code
Let's take a look at the first example code for the SparkFun Qwiic RFID ID-xxLA. You can download all the example code from the GitHub Repo or by clicking the link below.
Example 1 - Read Tag
For the scope of the tutorial, let's start at the top of Example1_ReadTag.ino. Open the example located in the in the examples folder: SparkFun_Qwiic_RFID_ID-XXLA>Firmware>Arduino_Examples>Example1_ReadTag . We use Arduino's I2C library called Wire. The product's default address is at 0x7D but can be changed to 0x7C by closing the ADDR jumper. You will also need to adjust the code to reference the RFID_ADD. TAG_REQUEST is the size of the RFID tag that we'll request from the Qwiic RFID when the interrupt pin attached to pin 8 goes low.
language:c
#include <Wire.h>

#define RFID_ADDR 0x7D // Default I2C address
//#define RFID_ADD 0x7C // Close "ADDR" jumper for this address
#define TAG_REQUEST 6

// We'll use a pin attached to the interrupt line to initiate the check for the RFID tag ID.
// Alternately the product can store up to 20 tags.
const int eventPin = 8;

void setup()
{
    // Begin I-squared-C
    Wire.begin();
    Serial.begin(9600);
    Serial.println("SparkFun Qwiic RFID, waiting for RFID to be scanned.");
    pinMode(eventPin, INPUT_PULLUP);// Our pin is active low so let's put it in a known high state.
}
In the loop, we're just monitoring the Qwiic RFID's interrupt pin that will indicate that a tag has just been read. Alternately, we could skip this and read it after an arbitrary amount of time to see the different tags that were scanned over some period of time. If you go this route, keep in mind that only 20 tags are stored at a time on the product.
When we read an interrupt, there is a call to the function checkTagID() that checks to see what tag has been read.
language:c
void loop()
{
    // When the interrupt pin changes to a LOW state, a tag has been scanned.
    if( digitalRead(eventPin) == LOW ) checkTagID();
    delay(250); // Slow it down
}
This is the meat of the code. It's a simple request to the product to hand over the first RFID tag that was scanned. Keep in mind that the product gives tags in the order that they are scanned. Each scan is unique because each tag that is scanned, gets a time stamp attached to it.
language:c
// 20 tags can be stored by the product at a time, the first one to be scanned is the first one
// to be pulled from the tag stack. If the tag reads '000000' or the interrupt line never went low
// then there are no new tags waiting to be read.
void checkTagID()
{
  byte tempTag = 0;
  // This variable stores the tag and could easily be a global variable. Just
  // make sure to clear it in between reads.
  String tagID;
    Serial.print("RFID Tag ID: ");
    Wire.requestFrom((uint8_t)RFID_ADDR, TAG_REQUEST);
    for( int x = 0; x < TAG_REQUEST; x++ ) {
    tempTag = Wire.read();
    // Concatenating the bytes onto the end of "tagID".
    tagID += String(tempTag);
  }
  Serial.println(tagID);
}
If you have not already, select the board and COM port of your Arduino and upload the Example1_ReadTag.ino code. Then open your Serial Monitor at 9600 and scan a tag,

You should see the following:

Resources and Going Further
Now that you've successfully got your Qwiic RFID Reader up and running, it's time to incorporate it into your own project!
For more information, check out the resources below:
We carry other RFID options. Do you want a high powered RFID reader that can simultaneously pick up multiple RFID cards at a time? Perhaps you'd rather a RFID card reader that transmits over serial, check out the options below.

Need some inspiration for your next project? Check out some of these related tutorials tagged with RFID:
SparkFun RFID Starter Kit Hookup Guide
Simultaneous RFID Tag Reader Hookup Guide
learn.sparkfun.com | CC BY-SA 3.0 | SparkFun Electronics | Niwot, Colorado