BadgerHack: Gaming Add-On Kit a learn.sparkfun.com tutorial
Available online at: http://sfe.io/t473
Introduction
The BadgerStick that you received by visiting a SparkFun booth at one of the various events we’ve attended can be hacked to perform a wide variety of tasks. The display may be small (don’t get your hopes up of running Doom on an 8x7 monochrome display). However, we can use it to display information and even play some basic games.
This tutorial will guide you through turning your BadgerStick into a micro gaming system. Remember the game Breakout? Let’s make a Breakout clone on our BadgerStick by adding a joystick and some buttons!
Required Materials
We will need a few other components to make a simple controller for the BadgerStick.
Suggested Reading
Before starting this tutorial, we highly recommend you work through the main BadgerHack guide first.
BadgerHack
September 23, 2015
Additionally, if you are new to soldering or electronics, we recommend you check out the following:
When you are ready to start hacking your badge, we definitely recommend reading:
Hardware Hookup
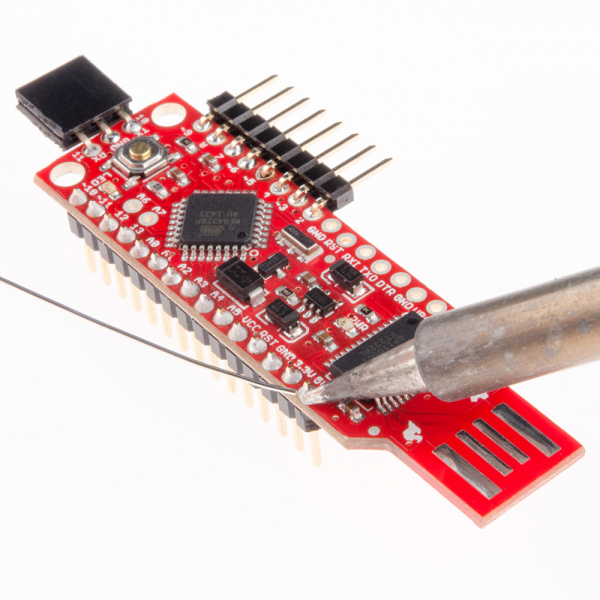
To begin, snap off 15 pins from the break-away headers, and solder them to the through-holes on the side opposite the LED array of the BadgerStick.
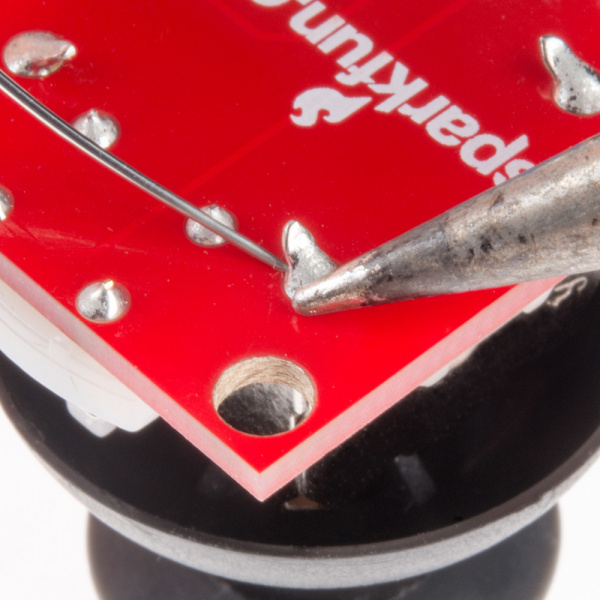
Solder the Thumb Joystick to the Thumb Joystick Breakout board.
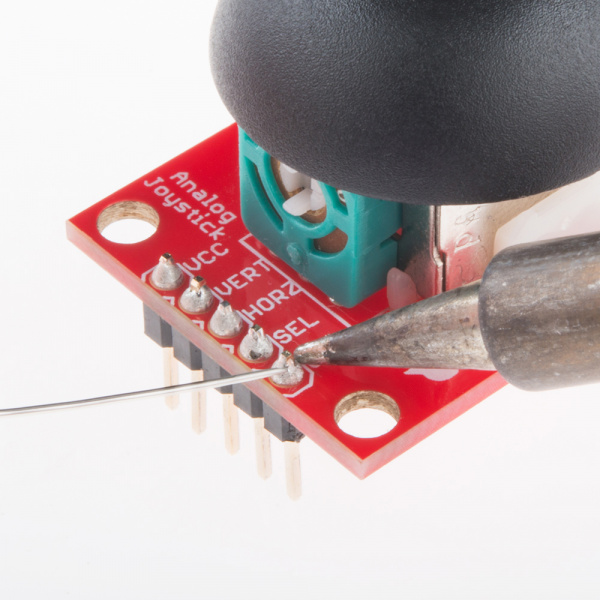
Snap off 5 pins from the break-away headers, and solder them to the through-holes on the Joystick Breakout Board.
Connections
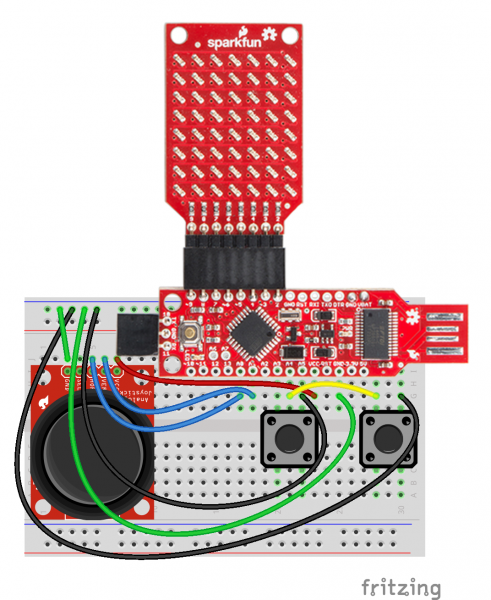
Place the BadgerStick in the breadboard with pin 10 in position i13 and pin 5V in position i27.
Connect the rest of the components as follows:
| Component | Breadboard | |||
|---|---|---|---|---|
| Thumb Joystick Breakout* | i7 (VCC) | i6 (VERT) | i5 (HOR) | i3 (GND) |
| Pushbutton | c20 | c22 | f20 | f22 |
| Pushbutton | c28 | c30 | f28 | f30 |
| Jumper Wire | ( - ) | g30 | ||
| Jumper Wire | ( - ) | g25 | ||
| Jumper Wire | ( - ) | g22 | ||
| Jumper Wire | ( - ) | j3 | ||
| Jumper Wire | j7 | g23 | ||
| Jumper Wire | j6 | g18 | ||
| Jumper Wire | j5 | g17 | ||
| Jumper Wire | g21 | g28 | ||
* Pins not listed are not used.
Wire colors correspond to the colors of the table above.
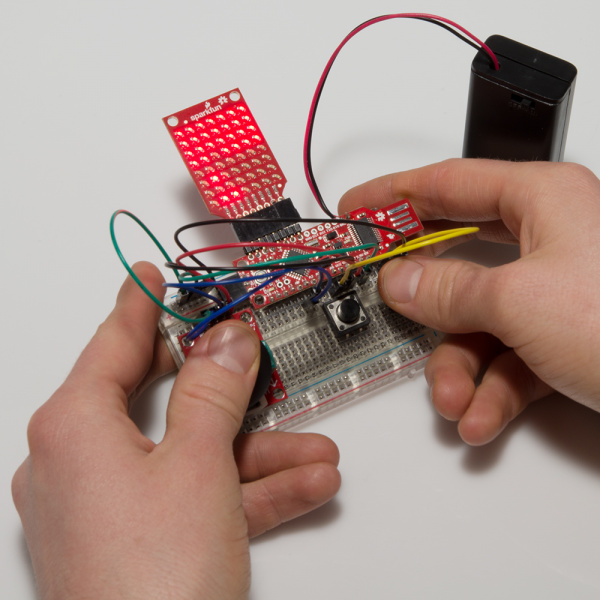
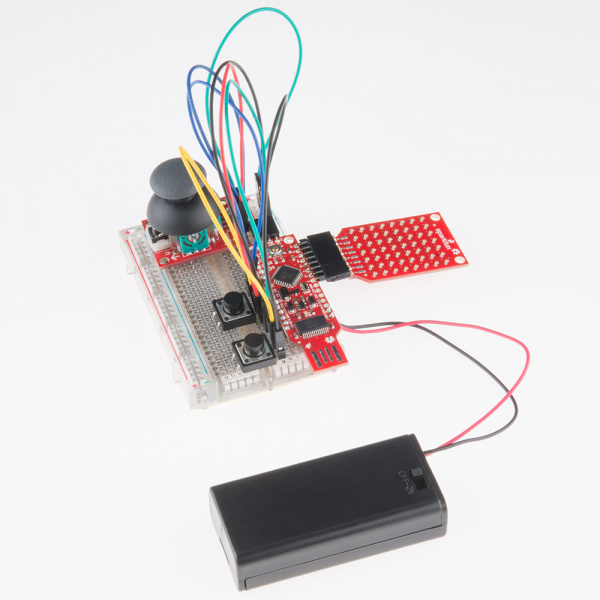
You should now have a makeshift game controller with a tiny LED screen!
The Code
Plug the USB side of your BadgerStick into your computer. Make sure “BadgerStick” and the associated COM port are selected in the window below. Click “Run on Arduino.”
Play
Once the sketch has been uploaded, prepare to play!
Use the joystick to move the paddle back and forth to bounce the ball. You win when you “break” all the lights on the top part of the screen. You lose if you let the ball go past your paddle.
Resources and Going Further
You might notice that we do not use the 2 buttons in the game. Breakout only requires a joystick. However, you now have a basic platform that is perfect for creating games!
What other games would you want to make? Here are some ideas:
Resources
- BadgerStick GitHub repository
- BadgerArray GitHub repository
- BadgerHack Demos GitHub repository
- Codebender LED Array library
Other BadgerHack Projects
Check out some of the other things you can make with the Badger:
BadgerHack: Sensor Add-On Kit
February 16, 2016
learn.sparkfun.com |CC BY-SA 3.0 | SparkFun Electronics | Niwot, Colorado

