SoftPot Hookup Guide a learn.sparkfun.com tutorial
Available online at: http://sfe.io/t514
Introduction
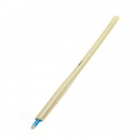
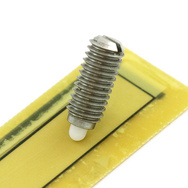
Soft potentiometers are very thin and very unique potentiometers. Instead of a knob or physical slider, the softpot’s wiper is any object – a finger, pen cap, stylus, etc – that can slide across its sensor membrane. Softpots can be used as position sensors in CNC machines, volume control sliders in custom stereos, throttles for drones, or in any project that requires linear movement sensing.

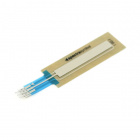
Like any potentiometer, the softpot is a three terminal device. The middle pin is the wiper, and the other two terminals are the high and low ends of the resistive element. By supplying the outer terminals with a power and ground connection, the middle terminal can be used to produce a variable voltage.
Suggested Materials
This tutorial serves as a quick primer on soft potentiometers, and demonstrates how to hook them up and use them. In addition to the softpot, the following materials are recommended:
Arduino Uno– We’ll be using the Arduino’s analog-to-digital converter to read in the variable voltage of the softpot. Any Arduino-compatible development platform – be it a RedBoard, Pro or Pro Mini– can substitute.
Breadboard and Jumper Wires– The soft pot three terminals are breadboard compatible. The breadboard is used as an intermediary device between sensor and jumper wires to the Arduino.


Suggested Reading
SoftPot’s are a great entry-level component for beginners, but there are still a few basic electronics concepts you should be familiar with. If any of these tutorial titles sound foreign to you, consider skimming through that content first.
Analog to Digital Conversion
Resistors
Analog vs. Digital
SoftPot Overview
Softpots come in a variety of sizes. The SparkFun catalog sports 50mm, 200mm, and 500mm long softpot strips. You can also find circular, arc-shaped, or other uniquely-shaped softpots in the market.
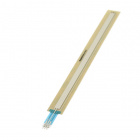
The 50mm and 200mm softpot’s feature a 10kΩ overall resistance between the outer-two terminals, while the larger 500mm softpot measures in at 20kΩ.
Placing your wiper at the base of the soft pot will effect a nearly 0Ω resistance between the middle pin and pin 1 (indicated by the arrow). When the wiper reaches the far end of the soft pot, the resistance will approach 10kΩ. And, if the wiper is in the middle, the resistance should be around 5kΩ.
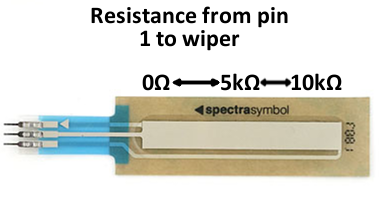
The softpot is generally linear across the entire sensor area, so any math you’ll do to determine a wiper’s position should be relatively simple!
Example Circuit
By supplying a voltage to the outer pins of the SoftPot, we can generate a variable voltage on the middle wiper pin. Here’s an example hookup:

You could build this same circuit using a breadboard.
By connecting pin 1 to ground and pin 3 to 5V, we cause the voltage on the middle pin to rise from 0V to 5V as the wiper moves from the bottom of the softpot (towards the terminals) to the top. Reversing the power supply can swap that relationship around.
Example Code
Here is a simple Arduino example based on the circuit above. Copy and paste this into your Arduino IDE (or use Codebender), then upload!
NOTE: For this example, we're hosting the code on codebender, which not only features code-sharing, but also allows anyone to upload and debug Arduino sketches from within a web browser. Plus, it works on lower-tech machines, like Chromebooks!
There are codebender plugins for Chrome, Chromium, and Firefox. Visit the codebender plugin page for help installing the codebender plugin.
After uploading, open your serial monitor, and set the baud rate to 9600 bps. Or, you can use the embedded serial monitor below.
Then actuate the softpot by sliding a finger, pencil eraser, tool grip, or anything slide-able across the sensing area of the potentiometer.
A series of line graphs should begin flowing by in the serial monitor.
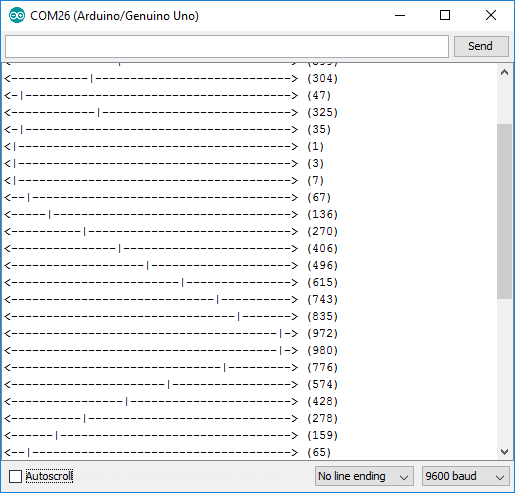
The raw ADC reading is also printed out after each reading. Take that, and start building sliding control systems of your own!
Resources and Going Further
If you need any further SoftPot-related documentation, here are a few resources that may help:
Now that you’ve set your Arduino up with slide-control, what are you going to build? Need some inspiration? Check out some of these SparkFun tutorials:
Touch Potentiometer Hookup Guide
Rotary Switch Potentiometer Hookup Guide
Bare Conductive Musical Painting
learn.sparkfun.com |CC BY-SA 3.0 | SparkFun Electronics | Niwot, Colorado