Qwiic Distance Sensor (VL53L1X) Hookup Guide a learn.sparkfun.com tutorial
Available online at: http://sfe.io/t784
Introduction
The VL53L1X is the latest Time Of Flight (ToF) sensor to be released. It uses a VCSEL (vertical cavity surface emitting laser) to emit a class 1 IR laser (940 nm) and time the reflection to the target. (You can’t see the laser but cell phones can) What does all this mean? You can measure the distance to an object up to 4 meters away with millimeter resolution! That’s pretty incredible.

We’ve found the precision of the sensor to be 1mm but the accuracy is around +/-5mm. The minimum read distance of this sensor is 4cm. In this hookup guide we’ll go over how to read distance, change ranging modes, and check the status of our range measurement along with the sample rate. We’ll also check out how to display distance and speed over an LCD display.
Required Materials
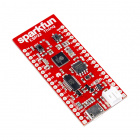
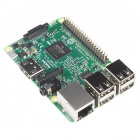
To get started, you’ll need a microcontroller to, well, control everything.


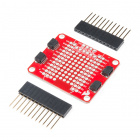
Now to get into the Qwiic ecosystem, the key will be one of the following Qwiic shields to match your preference of microcontroller:


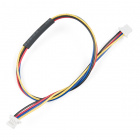
You will also need a Qwiic cable to connect the shield to your distance sensor, choose a length that suits your needs.


Suggested Reading
If you aren’t familiar with our new Qwiic system, we recommend starting here for an overview.
We would also recommend taking a look at the following tutorials if you aren’t familiar with them.
Serial Communication
Serial Terminal Basics
Qwiic Shield for Arduino & Photon Hookup Guide
Hardware Overview
First let’s check out some of the characteristics of the VL53L1X sensor we’re dealing with, so we know what to expect out of the board.
| Characteristic | Range |
|---|---|
| Operating Voltage | 2.6V-3.5V |
| Power Consumption | 20 mW @10Hz |
| Measurement Range | ~40mm to 4,000mm |
| Resolution | +/-1mm |
| Light Source | Class 1 940nm VCSEL |
| I2C Address | 0x52 |
| Field of View | 15° - 27° |
| Max Read Rate | 50Hz |
Pins
The following table lists all of the VL53L1X’s pins and their functionality.
| Pin | Description | Direction |
|---|---|---|
| GND | Ground | In |
| 3.3V | Power | In |
| SDA | Data | In |
| SCL | Clock | In |
| INT | Interrupt, goes low when data is ready. | Out |
| SHUT | Shutdown, can be pulled low to put the IC in shutdown mode. | In |
Optional Features
The VL53L1X breakout has pull up resistors attached to the I2C bus as well as the interrupt pin; both can be removed by cutting the traces on the corresponding jumpers on the back of the board, highlighted below.

The onboard LED (highlighted below) will light up when the board is powered, and the sensor (also highlighted below) should be left uncovered in your application.

Hardware Assembly
If you haven’t yet assembled your Qwiic Shield, now would be the time to head on over to that tutorial. Depending on the microcontroller and shield you’ve chosen, your assembly may be different, but here’s a handy link to the Qwiic Shield for Arduino and Photon Hookup Guide to get you started!
Qwiic Shield for Arduino Photon Hookup Guide
With the shield assembled, SparkFun’s new Qwiic environment means that connecting the sensor could not be easier. Just plug one end of the Qwiic cable into the VL53L1X breakout, the other into the Qwiic Shield and you’ll be ready to upload a sketch and figure out how far away you are from that thing over there. It seems like it’s too easy too use, but that’s why we made it that way!

SparkFun RedBoard and Qwiic Shield with the Qwiic Distance Sensor Attached
Library Overview
Note: This example assumes you are using the latest version of the Arduino IDE on your desktop. If this is your first time using Arduino, please review our tutorial on installing the Arduino IDE. If you have not previously installed an Arduino library, please check out our installation guide.
First, you’ll need the Sparkfun VL53L1X Arduino library. You can obtain these libraries through the Arduino Library Manager. Search for Sparkfun VL53L1X Arduino Library to install the latest version. If you prefer downloading the libraries from the GitHub repository and manually installing it, you can grab them here:
DOWNLOAD THE SPARKFUN VL53L1X ARDUINO LIBRARY (ZIP)
Before we get started developing a sketch, let’s look at the available functions of the library.
boolean begin(uint8_t deviceAddress = defaultAddress_VL53L1X, TwoWire &wirePort = Wire);— By default use the default I2C address, and use Wire portvoid softReset();— Reset the sensor via softwarevoid startMeasurement(uint8_t offset = 0);— Write a block of bytes to the sensor to configure it to take a measurementboolean newDataReady();— Checks if a measurement is ready.uint16_t getDistance();— Returns the results from the last measurement, distance in mmuint16_t getSignalRate();— Returns the results from the last measurement, signal ratevoid setDistanceMode(uint8_t mode = 2);— Sets distance mode (0 = short, 1 = medium, 2 = long)uint8_t getDistanceMode();— Returns the distance modeuint8_t getRangeStatus();— Returns the results from the last measurement, 0 = valid
Example Code
Now that we have our library installed and we understand the basic functions, let’s run some examples for our distance sensor to see how it behaves.
Example 1 - Read Distance
To get started with the first example, open up File>Examples>SparkFun VL53L1x 4M Laser Distance Sensor>Example1_ReadDistance. In this example, we begin by creating a VL53L1X object called distanceSensor and then initializing our sensor object in the setup() loop. The code to do this is shown below and is repeated in some form in all of the examples.
language:c
VL53L1X distanceSensor;

void setup(void)
{
  Wire.begin();

  Serial.begin(9600);
  Serial.println("VL53L1X Qwiic Test");

  if (distanceSensor.begin() == false)
    Serial.println("Sensor offline!");

}
Once we’ve initialized our sensor, we can start grabbing measurements from it. To do this, we send some configuration bytes to our sensor using distanceSensor.startMeasurement() to initiate the measurement. We then wait for data to become available and when it does, we read it in, convert it from millimeters to feet, and print it out over serial. The void loop() function that does this is shown below.
language:c
void loop(void)
{
  distanceSensor.startMeasurement(); //Write configuration bytes to initiate measurement

  //Poll for completion of measurement. Takes 40-50ms.
  while (distanceSensor.newDataReady() == false)
    delay(5);

  int distance = distanceSensor.getDistance(); //Get the result of the measurement from the sensor

  Serial.print("Distance(mm): ");
  Serial.print(distance);

  float distanceInches = distance * 0.0393701;
  float distanceFeet = distanceInches / 12.0;

  Serial.print("\tDistance(ft): ");
  Serial.print(distanceFeet, 2);

  Serial.println();
}
Opening your serial monitor to a baud rate of 9600 should show the distance between the sensor and the object it’s pointed at in both millimeters and feet. The output should look something like the below image.

Distance readings in mm and ft
Example 2 - Set Distance Mode
In this example, we’ll change the distance mode of the VL53L1X. The default long range mode is the most robust as far as sample rate and range are concerned, but for a slightly higher sample rate, you can bring the range down to medium (~3M) or short (~2M). To get started with the second example, open up File>Examples>SparkFun VL53L1x 4M Laser Distance Sensor>Example2_SetDistanceMode. The main difference between this example and the previous example is that after we initialize our sensor in the setup() loop, we first declare ints shortRange - 0, midRange = 1 and longRange = 2 to assign the proper values to our ranges. We then call distanceSensor.setDistanceMode(shortRange) to change the range of our sensor to short range. Although this feature is available, we’d recommend sticking with long range as it is the most robust.
Example 3 - Status and Rate
In the third example, we’ll read and average our distance as well as read the sample rate and status of each measurement. To get started with the third example, open up File>Examples>SparkFun VL53L1x 4M Laser Distance Sensor>ExampleStatusandRate. The status of a measurement can be any of 8 values. Our void loop() interprets the value returned by distanceSensor.getRangeStatus() and prints that value over serial. The below table shows the possible values of rangeStatus and their corresponding errors.
| Range Status | Error |
|---|---|
| 0 | Valid measurement |
| 1 | Raised if sigma estimator (uncertainty in measurement) check is above the internal defined threshold |
| 2 | Raised if signal value is below the internal defined threshold |
| 4 | Raised when phase is out of bounds |
| 5 | Raised in case of HW or VCSEL failure |
| 7 | Wrapped target, not matching phases |
| 8 | Internal algorithm underflow or overflow |
| 14 | The reported range is invalid |
In the example code, notice how the sketch stores our previous values in the array history so that the average distance can also be calculated. Uploading this sketch to your microcontroller and opening the serial monitor to a baud rate of 9600 should give you an output similar to the image shown below.

Click the image for a closer look.
Example 4 - LCD Demo
The fourth example requires a serial enabled LCD screen for us to write our distance values to. If you haven’t played around with a Serial enabled LCD before, checkout our hookup guide on the matter. To get started with the fourth example, open up File >Examples>SparkFun VL53L1x 4M Laser Distance Sensor>Example4_LCDDemo. We’ll first need to connect the RX pin of our Serial LCD to pin A3 on our Arduino. Connect 5V and ground on the LCD and the backlight should light up. Notice how we also include the SoftwareSerial library. Uploading the sketch to our Arduino then takes in our sample rate and distances. By using these values, it calculates a velocity. Like the sketch before, distances are stored in an array. The sketch uses these values in the array to calculate velocity and the velocity is then displayed along with the current distance on the LCD. The output on the LCD should look something like the below GIF.
Resources and Going Further
Now that you’ve successfully got your Qwiic Distance Sensor up and running, it’s time to incorporate it into your own project!
For more information, check out the resources below:
- Schematic (PDF)
- Eagle Files (ZIP)
- VL53L1X Datasheet
- VL53L1X User Manual
- Qwiic Landing Page
- GitHub Repos
- SparkFun Product Showcase: VL53L1X Qwiic Distance Sensor
Want a great use case for your ToF sensor? How about integrating one into your AVC submission? Have a look here:
Need even more inspiration for your next project? Check out some of these related tutorials:
Qwiic Differential I2C Bus Extender (PCA9615) Hookup Guide
Qwiic Shield for Arduino & Photon Hookup Guide
Qwiic Human Presence Sensor (AK9753) Hookup Guide
learn.sparkfun.com | CC BY-SA 3.0 | SparkFun Electronics | Niwot, Colorado