Raspberry Pi 4 Kit Hookup Guide a learn.sparkfun.com tutorial
Available online at: http://sfe.io/t1131
Introduction
The improved Raspberry Pi 4 Model B [ 2GB and 4GB ] is another upgrade in the line of Raspberry Pi single board computers, what's new? This hookup guide goes through the same process of getting going that worked with the previous Raspberry Pi Models.


There are a few kits available depending on your project. Depending on the version that you order, you can have one that includes the 2GB or 4GB RAM.

Materials Required
You'll need a mouse, keyboard, monitor, wall adapter with minimum power requirements, and cables to begin. Once configured, the Pi can be operated from its own peripherals or another computer connected over the Internet.
Kit Versions
Each version includes a Raspberry Pi 4 with a different size RAM. Check out below for the different kit versions available!
- Basic
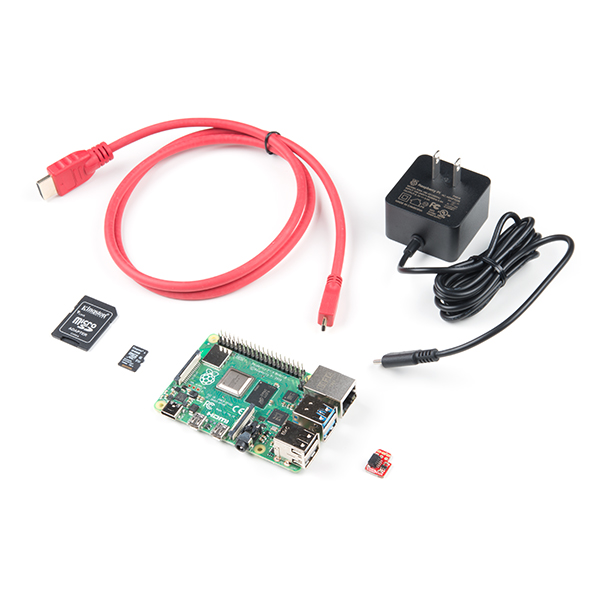
Basic Kit Version
The basic kit offers the bare bones of what you need to get up and running. This is assuming that you have a monitor, keyboard, mouse, and card reader [1] on hand.


The connectors are different on the Pi 4 so you will need the appropriate cable adapters to power the Pi and display to a monitor.
Getting an OS
The microSD card included in the kit does not have an image flashed. You'll need to flash a microSD card if a Raspberry Pi image to the card or if it becomes corrupt. There are a few Linux-based images available depending on your application. For beginners, we recommend getting NOOBS. Otherwise, the Raspbian with the PIXEL desktop would be the best.
- NOOBS (i.e. New Out-Of-the Box Software) - Contains Raspbian and LibreELEC. Other images can also be downloaded from the internet and installed.
- Raspbian - Official Raspberry Pi Debian-based computer operating system. There are three downloads. We recommend the desktop version with recommended software. The other downloads are the same but with less software. For advanced users, Raspbian Lite is the minimal text-only version and requires users to navigate using the command line interface (CLI).
- Other 3rd Party OS Images - There are other distributions available from third-party. If you are feeling adventurous, check out the other images available!
For the scope of this tutorial, we will summarize two of the images from the Pi foundation.
Flashing the Image NOOBS
If you decide to use NOOBS, you will need to:
- Insert the microSD card into a card reader
- Download the ZIP file for NOOBS
- Extract the ZIP file
- Format your Raspberry Pi's microSD card if needed
- Copy all the contents from the unzipped folder into the microSD card
- Eject the microSD card from your computer
Flashing the Image Raspbian and 3rd Party OS Images
Then follow the steps below to flash an image using the Raspberry Pi Imager.
- Insert the microSD card and card reader into your computer's port.
- Open the software imaging tool[2] of your choice (in this case, we'll use the Raspberry Pi Imager for your OS but you can use other images as well).
- Press CHOOSE OS to select the Operating System from the list (in this case, we'll use one of the Raspbian images but you could use any of the 3rd party images ).
- Press CHOOSE SD CARD to select mounted microSD Card.
- Press Write (it will take a while depending on the image and microSD card so just do a little dance as you wait).
- Eject the microSD card when finished.
SD Cards and Writing Images
June 4, 2015
Assembly
The Pi is straight-forward and easy to put together, but in the event that something doesn't seem right, this section will give you an idea of what it is supposed to look like.
Attaching Peripherals
Attach desired consumer computer equipment. At a minimum to get up and running or navigate through the Pi, we recommend connecting:
- DVI
- VGA
Connecting Hardware
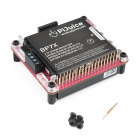
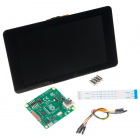
Need easy access to the GPIO pins on the board? If you ordered a Qwiic cable, Qwiic enabled device, and the basic kit version, take a look at the Qwiic SHIM to quickly access the I2C pins. Or if you included the Pi Wedge with prototyping parts in your order, check out the associated tutorial for the Pi Wedge to easily access the GPIO pins on a breadboard.
Qwiic SHIM for Raspberry Pi Hookup Guide
December 5, 2019
Preassembled 40-pin Pi Wedge Hookup Guide
October 29, 2015
Methods of Working with the Pi
Once the Pi is configured, there are a few methods of using it depending on if you want to use it like a desktop or manage it remotely.
This section covers using the Pi in the following ways
- Using HDMI-out with Monitor -- Operate your Pi like a desktop computer.
- Headless without a Monitor
- Using the serial terminal -- Some functionality.
- Using SSH -- Operate through a network linked to another computer.
- Using VNC -- Control the Pi's graphical desktop remotely over the Internet using a computer. This is useful if you decide to remotely connect to a Pi that may or may not be connected to a monitor.
Using HDMI-out with a Monitor
If this is the first time you are booting NOOBS, you'll need to connect your Raspberry Pi to a monitor and follow the installer. In the window, select Raspbian Full [RECOMMENDED] and click on the button to Install. You'll need to be patient as the software installs the OS to the microSD card. Once finished, click on OK. This will restart the Pi.
PIXEL Desktop (GUI)
By selecting NOOBS with Raspbian, it automatically logs in and starts a graphical user interface.
Once the desktop installs, follow the wizard to configure your Raspberry Pi!
Command Line Interface (CLI)
If configured to boot to shell, log in with the following credentials:
username: pi
password: raspberry
Then, enter startx in the command line to enter a graphical environment where you are presented with a desktop-type menu-driven operating system.
If you need to get back to text land, you can either
- Log off through the Task Bar Menu
- drops back to the shell, closing down the X window system
- Open xterm from the Task Bar
- opens a shell in a graphical window
- Use CTRL+ALT+1 through CTRL+ALT+8
- gives you a number of shells, with 7 being the graphic environment (if loaded).
Remember, shutdown with the menu item or enter the following command from a shell, and wait for the system to halt before removing power.
language:bash
sudo shutdown -h now
Headless without a Monitor
As an alternative, you can also log into the Pi as a "headless" computer. This is basically a Raspberry Pi without a monitor, keyboard, or mouse. You can decide to connect to the Pi using a serial UART or SSH. For advanced users, you will need to turn on the interfaces before you can take advantage of these setups.
Headless Raspberry Pi Setup
April 23, 2018
How to Use Remote Desktop on the Raspberry Pi with VNC
July 9, 2018
Configuring the Pi
This section goes over configuring the keyboard, wired, and wireless internet.
Configuring the Keyboard Layout raspi-config
The Raspbian distribution comes defaulted to European hardware. With US keyboards, the " (quotation mark) symbol is replaced by @ (commercial at) and our number sign # is replaced by the European pound sign £. This can make it aggravating when trying to #define things. Invoke the config tool with the following command in the command line:
language:bash
sudo raspi-config
Then take the following actions:
Set the default locale for the system
- Select "Internationalisation Options"
- Select "Change Locale"
- Deselect en_GB.UTF-8 UTF-8
- Select en_US.UTF-8 UTF-8, (Ok)
- Set default to en_US.UTF-8, (Ok)
Change the keyboard layout -- from the Internationalisation Options menu,
- Change Keyboard Layout
- Leave set as: Generic 105-key (Intl) PC (Ok)
- Select Other (Ok)
- Select English (US) (Ok)
- Select English (US) (Ok)
- Select default (Ok)
- Select No compose key (Ok)
- Set Ctrl+Alt+Bksp function (Ok)
Finish with the dialog and get back to the shell
- Try the " and # keys at the prompt. It may be necessary to restart the pi at this point.
Configuring the Internet Interfaces
Automatic Configuration
Raspbian does a good job of configuring wireless networks automatically. By default, DHCP is configured so that the Pi will receive an IP address when a network cable is plugged it to the Ethernet port or when a wireless network is connected.
To use the graphical network tool, right click on the icon on the right side of the task bar, and click "WiFi Networks (dhcpcdui) Settings". Then, select the interface desired (wlan0 or eth0) to disable the DHCP and set your own IP, if necessary.
To connect to a wireless network, click on the icon, select the desired network, and enter the password.
Hovering over the icon will bring up a status of wlan0 and eth0 that also shows the IP address.
Manual (text-based) Configuration
At this time, the network configuration works out of the box so there's really nothing to configure, but in case something goes awry, here's the basics of what can be played with and a known-working configuration to compare with.
A configuration file, interfaces, configures both wired and wireless devices. Enter the following command into a terminal to edit the interfaces file.
language:bash
sudo nano /etc/network/interfaces
Replace "nano" with "leafpad" if you prefer graphics. Here's what our Pi 3 is using:
language:bash
# interfaces(5) file used by ifup(8) and ifdown(8)

# Please note that this file is written to be used with dhcpcd
# For static IP, consult /etc/dhcpcd.conf and 'man dhcpcd.conf'

# Include files from /etc/network/interfaces.d:
source-directory /etc/network/interfaces.d

auto lo
iface lo inet loopback

iface eth0 inet manual

allow-hotplug wlan0
iface wlan0 inet manual
    wpa-conf /etc/wpa_supplicant/wpa_supplicant.conf

allow-hotplug wlan1
iface wlan1 inet manual
    wpa-conf /etc/wpa_supplicant/wpa_supplicant.conf
By default, this file is set up to get its configuration from /etc/wpa_supplicant/wpa_supplicant.conf, which is really the proper place for wifi information. Here are the contents:
language:bash
ctrl_interface=DIR=/var/run/wpa_supplicant GROUP=netdev
update_config=1

network={
        ssid="myNetworkSSID"
        psk="mySuperSecurePassword"
        key_mgmt=WPA-PSK
}
Applying the Changes
Sometimes the link should be cycled for a new configuration to take. Rather than shutting down the pi and restarting, use ifdown and ifup to bring the link down and back up.
For wireless connections, use
language:bash
sudo ifdown wlan
and
language:bash
sudo ifup wlan0
For wired connections, use
language:bash
sudo ifdown eth0
and
language:bash
sudo ifup eth0
Troubleshooting
Having issues getting the Raspberry Pi to work? Check out this sticky note from the Raspberry Pi Foundation's forum for basic troubleshooting.
Having problems with a piece of SparkFun hardware designed for the Raspberry Pi and interfacing it? Try checking out the SparkFun forums to see if we can assist.
Resources and Going Further
Raspberry Pi Accessories
If you are looking to add additional features, check out the accessories to power your Raspberry Pi remotely, build a homemade motion-activated security system, or go retro by building your own arcade controller to emulate classic video games!

Here are some links to our other Pi resources.
- Raspberry Pi Foundation
- Getting Started with the Raspberry Pi
- Product Brief (PDF)
- Schematic (PDF)
- Mechanical Drawing (PDF)
- Documentation
- Projects
- Pi Foundation Forums
- Raspberry Pi Forums: Is Your Pi Not Booting? - Basic troubleshooting tips and solutions for a Raspberry Pi that is not booting up.
- The gPIo tutorial
- The SPI and I2C tutorial
Need some inspiration? Check out these tutorials and projects.
SD Cards and Writing Images
Qwiic pHAT for Raspberry Pi Hookup Guide
Qwiic SHIM for Raspberry Pi Hookup Guide
Or check out some of these blog posts for ideas.
learn.sparkfun.com | CC BY-SA 3.0 | SparkFun Electronics | Niwot, Colorado